Saturday, August 12, 2017

Air Show Part 2

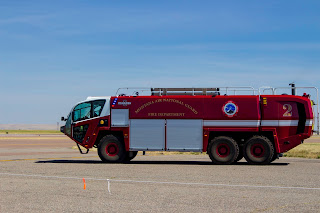
A few weeks ago I went to an air show in Great Falls Montana. For this post I wanted to share some more pictures from the air show. This time the pictures are some of the static displays from the show including the B-1 Bomber. It is always fascinating to get to go to events such as this. With this event they made it so that we could see military equipment from the Army, Air Force, and Navy.

So if you have an opportunity to go to any type of military show or air show these are great places to be able to take pictures. Other festivals and events that may be occurring in your area including fairs if there is still any going on near you are also fun places to practice taking pictures.

So when you have a chance go out, take advantage of what is happening around you for opportunities to take pictures, and be sure to have fun while doing it. Photography is all about having fun, especially if you have family that you can take with you, and enjoying the outdoors.


Army


Navy


Air Force


Thursday, August 3, 2017

Wonders for editing

Can you believe it's already August. That means fall is just around the corner and a whole new world for pictures with the wonderful variety of colors. But that is not for a little while yet.

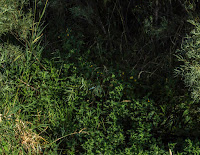
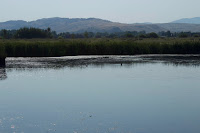
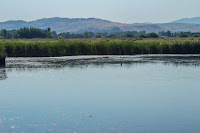
Today we are going to look at editing once again. There has been one program that since I have started writing this blog I have learned a lot about how to use and it can make large differences in the finished images. These pictures are not some examples of some of my better stuff but it is a good example of what Light Room can do. This is a program that I checked out a text book from the library to help better learn the program. Below is some before and after edit examples to show what can be done. 

For those without access to Adobe Light Room other free editing programs can do similar stuff but I can't say to how great an effect. 

So till next time continue to enjoy your summer and be sure to take your camera because you never know where that next great picture may be.


Before - Under exposed image                                                            After - with corrections


 Before - again Under exposed Try to find the dragon fly.
                                                                                          After - Cropped and exposure adjusted                
                                                                                                  unfortunately the dragonfly is blurry. Try photographing one sometime its a challenge. 


Before - some areas under exposed some over exposed                

    After - Able to adjust different    
                                                                                                      area while brightening the shadows        


So as you can see a bad picture that you take does not mean it is destined for the recycle bin. It may take some time and little work but images can be salvaged.

Monday, July 24, 2017

Great Falls Air Show

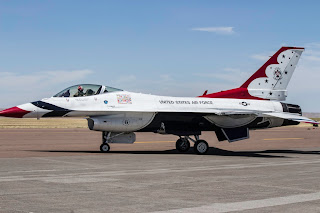
Over the weekend I had an opportunity to go to an air show featuring the United States Air Force Thunderbirds, which provides great opportunities for photography. Whether it is planes on the ground set up for people to look at or looking towards the skies for high flying acrobatics and aerial stunts. One of the trickiest parts to photographing an air show is the speed which the planes are moving providing the challenge of tracking a plane that may be moving at 300+mph and having your shutter speed set right to be able to freeze the object for a clear picture. The other big challenge is trying to focus at that speed. This is a situation where auto focus can be both your friend and enemy. I'll discuss tricks that I used for focusing on objects in a field of blue in future posts. So if you have a chance to check out an air show I would highly recommend it. If you want to see the Thunderbirds who put on a spectacular show check out the link above to see where the closest show to you may be.

Be sure to enjoy your summer and take your camera with you. Even if you are not planning to take pictures you may find that you want to. So go out take lots of pictures and as always be sure to always be safe in your activities. 


Thursday, July 20, 2017

Rule of Thirds

When you go out and take photos a rule to remember to help compose your pictures is known as "The Rule of Thirds". Dispite the fact that you may feel that the subject of your photo should be centered, if the subject is located in one of the thirds, it will help the image provide parts of the story, as in showing a subject entering from one side or leaving towards another side. If you check the menu on your camera you may find the your camera has a setting to display a grid to help you see your screen in thirds to help you visualize the rule to help use it in your photography. 

Next time you are out taking pictures try experimenting with positioning including the use of the rule of thirds and see what this can do for you photography. 

So grab your camera and head out and take pictures and remember to always be safe in you photography activities.  

Here is some examples of how the Rule of Thirds can be used,


With this picture you can see how the plane is taking up the left 2/3 of the image leaving the right 1/3 for you to visualize the plane to move into knowing it is about to take off.


In this picture, it is broken in to 3 parts. The right 1/3 of the Fram has the jeep driving out of the frame while in the center 1/3 you have a plane moving from left to right. This can be told by the left 1/3 of the from being empty showing everything in motion to the right of the image


Some times when you are photographing fast moving objects the Rule of Thirds is hard to get. Even if objects are centered sometimes it can still make for nice pictures such as the one above. The trick is you just don't want to shoot every picture centered. Try experimenting, you may be amazed at what this one little trick can do.

Wednesday, July 5, 2017

Planning Shoots

When it comes to doing photo shoots, it doesn't hurt to do some planning in advance if you can. One of the things to think about is the time of day to do the shoot. Think about where the sun is going to be compared to the subject you are shooting. Try to plan to take the pictures so you are not shooting with the sun directly behind your subject. Another thing to think about is weather. If it is cloudy you won't get as bad of shadows do to the light being more diffused and spread out by the clouds compared to the harshness of the direct sunlight. Also later evenings can give nice golden tones to the picture. So next time you are planning to go out and take some planned pictures with the family or friends keep this in mind and plan ahead for the best lighting and take great looking pictures.

So go ahead and go out and take some great pictures and have fun while doing it, don't forget as always be safe in everything that you do.

Here is a few more pictures from the trip I took to Yellowstone.


Lake Store 
located along the shore of Lake Yellowstone in Lake Village


Hamilton Store
located lower portion of Old Faithful basin near Old Faithful Inn


Old Faithful Inn


Thursday, June 29, 2017

Still learning

There come times where people like me still have to learn. Yes, even I do not know everything yet. With programs like photoshop continuing to evolve and cameras continuing to become more complex, you have to continue to learn the operations to make the best image possible. One way to learn is by going to your local library to check out books. One that I got recently is on working with photoshop lightroom. 


I also like to get books that give tips on how to photograph other types of things. You can find books that give tips about how to photograph different things. An example is this book, How to photograph everything. 


So if you are looking for something to read that can help you develop your photography skills head over to your local library and see what you can find. The above book would be a great one to look for. So on your way out to take those pictures, go to your library and check out a book on photography. 

Sunday, June 25, 2017

4th of July Photos

With the 4th of July coming up I thought sharing a couple of tips on photographing fireworks displays could be fun. The biggest thing that can make photographing fireworks complicated is that you are shooting in a low light situation with a extremely slow shutter speed which means the least little movement to the camera will show up. if you have a basic camera, you should check your presets and see if there is a fireworks setting. This is becoming a regular feature on basic camera presets. It is also showing up on a few DSLR cameras.

If you have a DSLR camera shooting in manual mode is the best way to photograph fireworks.

Here are the settings that you would want to use to get the photos

ISO 100 or 200

Apature f/11 or f/16

Shutter - This one is a little more tricky. If you set it to a bulb, manual release and use a remote you would hold the shutter for 2-5 seconds. The camera has to be on a  tripod for this. you could also set it for a 2-3 sec shutter speed. This is a long exposure but it should work well.

Do not use Auto Focus. Set your focus at infinity

Set Daylight White Balance

Turn off Noise Reduction

NO FLASH

Needed Equipment

Camera, Charged Battery, Tripod, Remote Shutter release, Memory Card

If you have a program at home to edit RAW photos this is the best format to shoot since it gives you the most flexibility for editing and manipulating your photos.

Hopefully you are able to take your camera out and get some photos of the celebrations near you using these tips. After the 4th I will show you what I come up with. This will be my first time using these tips so it will be fun for me to experience this myself as well.

So grab your camera, head out have fun and take some photos. Remember to be safe in all your activities as we begin to approach the 4th of July weekend.

The image below is not mine, it is used from freeimages.com